Thursday, February 9, 2012

The 5 Minute Make Over


Let’s face it. Looking pleasant in the morning, gives us a positive vibe and it does make an impression. Same goes when we look tired , everything seems to be dragging and it usually triggers our temper.

Who doesn’t want to look fresh as you attend to your daily routine? Whenever we talk to our workshop attendees we always ask them what they think about makeup, there’s usually one story to hear: Putting on makeup takes so much of their time, and that it isn’t necessary unless you’re going to a party.

Putting on makeup doesn’t necessarily mean you have to run around looking like a clown. You don't need to spend hours on your makeup -- unless you're going to a wedding or other special event. A few quick tricks in the morning can hide your imperfections and accentuate your assets, now who doesn’t want that? It doesn't hurt to give yourselves the much needed 5 minute attention. After all, you deserve it.

Here’s a step by step 5 minute makeover, which I use myself. If you were able to attend one of our workshop, (specifically from our 5th workshop- onwards.) I always do a demo on this to show our participants how makeup can instantly improve our looks without looking like you just stepped out of the salon. This can be very useful specially to working moms who are always on a rush ending up looking worn-out before even starting your day. My demo never fails to change our attendees’ impression on makeup application. Try to go through these steps and witness how makeup can give you the “I –just-had-an-8-hrs-of-sleep” look!

Of course I don’t have to tell you every time to never ever take your skin care routine for granted specially the minute you reach the age of 20. You will start seeing the benefit of these routine as you age.

1. Cleanse – Every morning before you do anything else to your skin, wash your face. Same goes before you sleep at night. Never sleep with your makeup on, always wash your face using your chosen facial cleanser before going to sleep and after waking up.

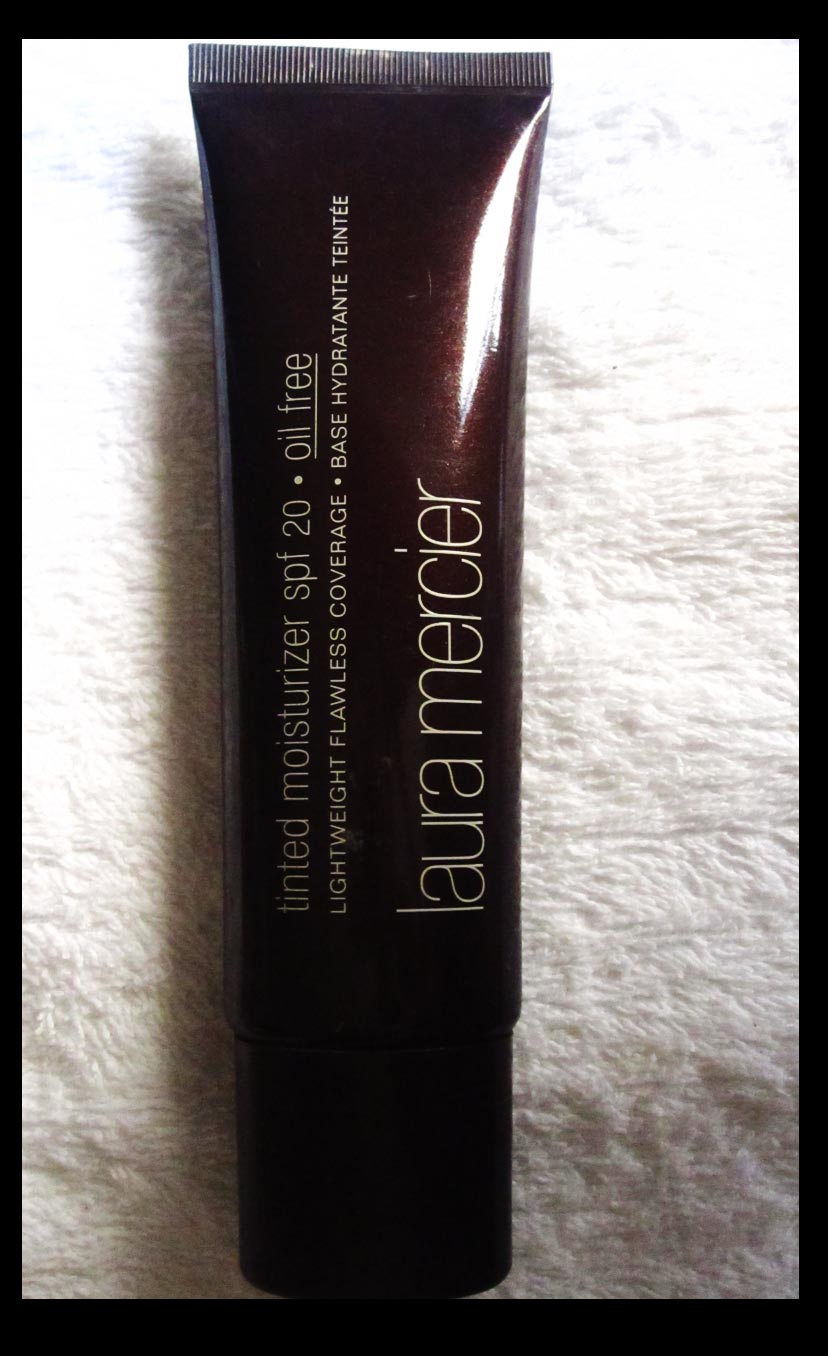
2. Tinted Moisturizer – While your skin is still damp from washing, quickly apply just enough amount of tinted moisturizer, using a sponge or your finger tips. This will serve as your foundation. Just spread it evenly on your skin, same way you apply your regular moisturizer, this should just take a few seconds to get an even application. Why tinted moisturizer? Let me tell you why I chose this over the usual liquid or compact foundation that makeup artists normally use on special occasions.

· Time saver: Tinted moisturizers can give you a fresh, natural look without the need to apply foundation makeup. You might find that tinted moisturizer is the only beauty product you need on many occasions. It can save you time by combining a simple makeup solution with a beauty product you already use. If you are a busy woman, this can help you look your best without taking up a large chunk of your morning time.

· Sun protection: Many tinted moisturizers combine SPF protection along with a hint of color. This combination protects your skin from the harmful effects of the sun while providing even color coverage and the skin-nourishing moisture of ordinary moisturizers. Using a tinted moisturizer with SPF every day is a healthy habit that will help you keep your face fresh.

· Younger looking skin: Some heavy makeup can make wrinkles appear more pronounced instead of deftly hiding them. Tinted moisturizers can help hide wrinkles and fine lines because they have lighter formulations than most foundation makeup. The coverage provided by tinted moisturizers also serves to minimize skin imperfections and wrinkles to provide a healthy, more youthful look.

· Moisture protection: If you are skipping moisturizer, then you might not be caring for your skin properly. Quality tinted moisturizers can work to hydrate the skin and help to prevent moisture loss while evening out your skin tone. The added moisture helps to keep the skin elastic and soothes the inflammation of dry, irritated skin.

Some quality tinted moisturizer brands that I recommend:

Laura Mercier (named as the best tinted moisturizer , quite pricey but its really good and its worth every penny. Available in 2 variants: oil free and skin hydrating, I'm using the oil-free variant, because my entire face tend to get really oily, not just the t-zone area. ), Myra Vita Glow Tinted Mositurizer (if you’re on a tight budget this works fine as well, I also use this whenever I run out of my usual brand) , Nivea (not sure though if this is still available in the market today, but I used to have this and its really good) and Benefit’s You Rebel Tinted Moisturizer.


3. Concealer – Conceal only when necessary. I prefer liquid concealer for everyday use so it won’t give you that heavy feeling to the skin, its also your best bet to combine with your tinted moisturizer. Just put a small dot on your fingertips and apply by gently patting it on the desired area until it blends to your skin – normally you apply this on the under eye area or any other skin imperfection that wasn’t able to cover by your tinted moisturizer. Do not overdo it since our aim here is to look as natural as possible. To hide those dark under eye circles , choose a concealer that is one shade lighter. Concealer shades can be complicated for those who aren’t familiar with makeup, (Concealer has different shades: green, orange, violet, beige, pink, white etc..) because it varies depending on what you are trying to hide we usually use these for bridal makeup which often requires a perfect , flawless finish. However, if its just for your daily makeup routine, you may use a concealer according to your skin tone.

If you think your tinted moisturizer already did a good job in evening out your skin tone, feel free to skip the concealing part. I personally do not use concealer for my everyday makeup.

However, should you decide to use a concealer, don’t forget to top it off with a smoothing layer of powder foundation. Just a little amount to set your concealer.

4. Apply Loose Powder – After applying your tinted moisturizer and concealer, get your big brush, dip it in your loose powder, tap it to remove excess powder then lightly dust it all over your face, using feathery strokes. Be careful not to deposit too much powder just a little amount of talc should do the trick. If you want to achieve a natural flawless finish, use a brush. The powder should not only make your skin look smoother, this should also eliminate the sticky feeling caused by the moisturizer and for your makeup to last longer.

5. Blush – Choose a subtle shade of blush that complements your skin tone, you can ask help from your reliable makeup consultants. (for first timers living here in Manila, I suggest you go to Rustans' makeup counters they usually have professional makeup artists situated in each area, they can help you choose the right shades for you) Always try it on to yourself first before buying anything. Avoid blush that has shimmer in it if you want your makeup to look as natural as possible.

How to apply: First, start with a good quality blush brush. You can accentuate your face and cheeks naturally. Smile and you will see the fleshy part that stands out the most - this is the apple of your checks. This is your starting point for applying your blush. Apply a light layer of blush to the apples of your cheeks and blend up and back TOWARDS THE DIRECTION of your hair line (NOT UNTIL YOUR HAIRLINE), do not forget to blend, we don't want you looking like someone just slapped or punched you on the face. A 2-second swipe for each cheek should be enough, don’t overdo it!.


6. Mascara – Fear not!! this look doesn’t require you to put on any eyeshadow or eyeliner…all you have to do is put on a mascara to emphasize your eyes. Believe me it does wonders! use waterproof mascara to avoid smudging. If you do not have eye makeup remover, you can take it off with the help of a baby oil.

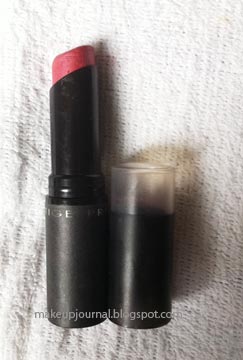
7. Lip Moisturizer / Lip Gloss / Lip stick – Make sure that your lips are well moisturized. One sure way of looking unhealthy is having a pale, dry , cracked lips. Again, if you want it to look as natural as possible, you may use a lightly tinted lip gloss instead of the usual lip stick. If you plan to go out at night, that’s the perfect time to use your favorite lip shade.

...and voila! Now who can tell that you just had a few hours of sleep? Try this and you'll stop hearing these words: YOU LOOK TIRED HONEY!

Enjoy!
Photobucket


photo credits:
http://getridofeyewrinkles.com


Monday, October 31, 2011

Go NAKED!

Urban Decay's Naked was released last year for their fall collection. Trust me, this has been my ever -reliable palette whenever I do bridal, I just can leave home without it. I would simply describe it as the only palette that you'll ever need. Be it from soft neutral look too hot smoky glam, your collection wouldn't be complete without it. So far, its the best Urban Decay palette I ever tried. Packed in a velvety -chocolate color sleek case, which looks really sophisticated, you just got to have one.


Though I know this is not something new to us makeup junkies, I received a few messages requesting me to do a demo using the Naked palette, so here goes..

THE MUST-HAVES:

1. MODEL & CO 4 pc brush set -
Its my first time to try their brush and I actually liked it. The bristles are not too soft and not too hard, just enough to be able to blend well and the bristles aren't harsh to the skin.


2. LAURA MERCIER Oil-Free TINTED MOISTURIZER -
This time I decided to use a tinted moisturizer instead of the usual foundation. So far this is the best tinted moisturizer I ever tried, though a bit expensive compared to other tinted moisturizers, this one has a buildable coverage giving you the same result of a good quality foundation without having its usual heavy icky feeling to the skin. ( Read more about Laura Mercier Tinted Moisturizer on my past blog entry: http://makeupjournal.blogspot.com/2008/10/laura-mercier-four-steps-to-flawless.html)


3. Model & Co Blush Cheek Powder in Peach Bellini, Bloom Lip Gloss in Gyspy, BDB (Billion Dollar Brows) A hint of tint. I got all these from Beauty Bar Philippines.


4. NARS Lipstick in Schiap - This is the hottest shade of pink lip color that you'll ever find in the market today. It has a matte finish but it glides perfectly on your lips.


5. URBANK DECAY Ink for the Eyes - If theres one product from Urban Decay that I would recommend you to buy - aside from their 24/7 eyepencils and Naked Palette , its the UD Ink for the Eyes. It comes with the applicator angled brush to create the perfect eye line and the smoldering tip that gives it a good smudge to create a smoky or natural line. It blends with ease but the product doesn't wear off easily.

Go NAKED!

1. First of all, have your skin prepped. Do not forget to Cleanse, Tone and Moisturize. This time I used Juice Beauty toning facial mist. It smelled great and it was able to cleanse my face really well without the sting that the usual toner does to our face. Another nice thing about this product is , its organic, its all natural, so its prefect for sensitive skin. You can score this at Beauty Bar Philippines.

2. Apply your tinted moisturizer evenly all over the face. I always use a stippling brush when applying any liquid or cream foundation to my skin.
(Learn the advantage of using a stippling brush , read about it from my past blog entry here --
http://makeupjournal.blogspot.com/2011/10/beauty-bar-get-missy-lee-look.html
)

3. After applying foundation or tinted moisturizer, dust enough amount of loose powder all over the face using a powder brush to set your foundation.

4. Contour - You have the option to contour or not, for daytime you can leave it as it is without contouring but for evening wear ,I advise you to contour your face to further enhance your facial bone structure . You can see the difference from picture 3 and 4 , picture 3 looks flat , while the last picture which was contoured looked so much better. This is also a must if you plan to take pictures. The contour itself gives you a complete look without adding any color to your face.

5. Groom your eyebrows ALWAYS. Comb, snip, shave , pluck or have a threading session with a pro, I don't care but If you want your eyes to pop beautifully, always groom your eyebrows. I really don't get it why some still prefer to have a bushy eyebrows. If you think keeping your bushy- stubborn eyebrows give you the natural look, you may want to think about it again.

(double click on the pic to see instructions)

For this particular look I used 4 shades from the Naked Palette: Half Baked, Buck , Creep and Virgin

6. Using an eyeshadow applicator brush , apply Half-Baked on to your lids until the crease line.
Blend well towards the brow bone, make sure that there are no harsh lines.

7. Using your round tip eyeshadow brush, apply buck on your crease line. Blend by following the natural contour of your eyes. When blending, remember NOT to blend it too much because this might wash off the color of your eyeshadow completely. Jut use the right amount of pressure.

8. Deepen the crease in the outer corner of your eyes by applying and blending in Creep.

9. For highlights, add a touch of Virgin to your brow bone and inner corner of your eyes, blend very lightly.

10. Put on your eyeliner, using UD's Ink for the eyes.
11. Smudge it with the smudge tip, to give it a more natural - smoky effect.

and now your look should be similar to this:

12. Curl your lashes and add two coats of mascara. To those who refuse to use mascara, okay fine . But here's the reason why I prefer you to use a curler and a mascara:

The left eye, obviously doesn't have a mascara on . While the right eye, looked really bigger and bolder than the other eye, and its all because of a curler and a mascara. If you're not convinced, go try it yourself. :)

A nd for the final touches, put on your Peach Bellini blush on to the apples of your cheeks , this shade goes really well on morena skin. Swipe on your Schiap lipstick and top it off with Bloom's Gypsy lip gloss and voila!


Hope you like it! ;-)

Photobucket

Saturday, October 15, 2011

Beauty Bar: Get the Missy Lee look!

Think of a happy place....what's the first thing that comes into your mind? probably a room full of chocolates?your dream travel destination? a carnival perhaps? If you ask me, I'd say Beauty Bar is the one! Being a certified makeup junkie that I am, this place is usually my sweet escape :) and I'm sure other makeup enthusiasts can relate :)) I love the fact that they carry high quality brands that are good alternatives to overly expensive hi -end ones.I've been a fan ever since I started exploring the art of makeup that's why I was so excited when I found out that they launched the Get The Look contest, I just dig into my stash , brought it with me to work, since we had a prenuptial shoot that day and did my look while we were patiently waiting for the shoot to finish :) Good thing I just had a trip to Beauty Bar few days before that, perfect timing to use my newly bought goodies :D

My entry name is Ms. Missy Lee, the look was bohemian-gypsy inspired and while I was surfing through the net I learned that Missy Lee was a famous gypsy name then...perfect! I didn't want it to look too "costume-y", so instead of the usual gypsy eye makeup, I did a much wearable smokey hue,and made sure that the finish is dewy and glowing. Remember, smoldering eyes don't always require black. Brown or gray is good if you want a softer look. I wanted it to look young and fresh that's why I opted for a dewy finish, while I used soft hues and coral shades which, by the way - goes really well with our gorgeous Pinay skin tone!

Thank you Beauty Bar for choosing my piece amongst all the fabulous makeup look entries! Now let me share with you how you can achieve the same makeup style right in front of your own vanity mirror.

THE MUST-HAVES:

FACE:

1. Face Primer or Moisturizer - Again, always start off with a clean, well-prepped canvass. If you want your makeup to last longer, start using a face primer or a moisturizer that suits your skin.

2. PALLADIO - (oil-free) Herbal Foundation - If you're fed up spending on really expensive tinted moisturizer ( I know, I am . I used to buy this hi-end brand of tinted moisturizer and the price is no joke!) Palladio's Herbal Foundation gives the same result! This is said to be a foundation, but it gives the same feeling of a tinted moisturizer. It doesn't give you the icky heavy feeling on your skin. Its lightweight, but has buildable coverage. It nourishes your skin, giving you a dewy healthy glow! Now if you have really oily skin, just make sure you keep an oil blotter with you, and you're good to go!


3. Natural Rice oil -absorbing Rice Powder - It is good as an oil absorbing highlighter and makeup setter. I've been buying this for my own personal use for three years now , this is a perfect alternative to expensive loose powders in the market today. It gives you the same good quality plus it doesn't clog your pores - its non-comedogenic!


4. Bloom Sheer Colour Cream Blush in Shy - I just love-love-love the shade of this blush,Im not a cream blush fan , but this one is perfect for my morena skin :) Its like Nars' orgasm (minus the shimmer) and it smells really good!!

EYES/EYEBROWS:


1. Prestige Brow Perfection Total Shaping Studio - its hard to look for a brow shader that actually delivers, I'm glad I found this at Beauty BaR because it works! For a more subtle and natural effect, instead of using an eyebrow pencil try using an eyebrow angled brush with Prestige Brow Perfection palette.


2. Prestige Brow Perfection Brow Building System - If you have eyelash mascara, you should also have this for taming those stubbron eyebrows.


3. Bloom Eye Shadow in Slate - I love using gray instead of black when doing my smokey eye and Slate gives me the perfect amount of gray!


4. Prestige Eyeliner in E 14 Charcoal - Finally!! a much affordable eyeliner that doesn't wear off easily, and most of all....its the perfect shade of gray :)


5. Smashbox Bionic Mascara - it served its purpose :))


LIPS:


1. Sara Happ Lip Scrub - Need I say more? read more about this fantabulous product from my past post -- http://makeupjournal.blogspot.com/2011/08/love-those-lips.html


2. Prestige Lip Color in Constant Coral - I am loving coral these days and this gives me the perfect pout!


3. Bloom Lip Gloss in Seashell - use it on top of any lip color and it always look good on my lips.


Before anything else, let me introduce you to my pretty little helpers . These are the basic tools I depend on when it comes to proper makeup application.

1. Stippling Brush - If you want a fast, flawless foundation application, this is the one. It was said that this brush was created to give the same effect of an airbrush, oh well - airbrush is airbrush but I'm pretty much satisfied with what my stippling brush can do! It does wonders :) If you want a foundation with smooth even finish - looking almost next to your skin? start using a stippling brush!There's a proper way on how to use it so start familiarizing yourself with it!
2. Applicator brush and Blending brush
3. Angled Brush for the eyebrows
4. Blush Brush (which could also double as your powder blush if you have limited number of brushes)

GET THAT LOOK!

1. Make sure that you cleanse your face, use a toner if necessary , put on your face primer or moisturizer

2. Leave it for a few minutes then apply your Palladio Herbal Foundation using a stippling brush. Make sure that you have an even application.

3. Let it sit for a while and then apply Bloom cream blush on the apples of your cheeks. You can use your stippling brush for application or carefully smudge enough amount of the blush against your cheeks using your finger tips.

4. Using a powder brush or a puff, simply brush the Natural Rice powder all over the face to set your makeup. Be sure to deposit just the right amount of powder. The use of powder brush will give you a more natural finish.

5.Groom your eyebrows - snip before you shave or pluck. Its the same way as how we treat our tresses, if it gets long, you have to cut it. Remember to GO SLOW. Draw them first if you have to , but pluck one hair at at time and make sure you take a step back to see if you are doing well.

6. Define your eyebrows - Apply the Prestige Brow Perfection total shaping studio using your angled brush. Practice defining your eyebrows by using the angled brush for a more natural effect.

7. Using an applicator brush, apply the Bloom eyeshadow in slate to your lower lids up to the crease, follow the contour of your eye and blend going to the direction of the brows ,careful not to reach the part of the brow bone area since this will give you a messy eye makeup. If you want to deepen the crease in the outer corner of your eye, blend in a darker shade of eyeshadow. when blending be careful not to totally diffuse the color, just use the right amount of pressure, and make sure that there are no visible harsh lines. For highlight, I used Benefit's Hi Brow pencil, just apply to the inner corner of the eye and brow bone, then blend using a brush or your finger tips.

8. Apply Prestige Charcoal eyeliner to lower and upper lash line, then smudge it gently by using a q-tip if you don't have a smudger tip. This creates a smokey effect instantly. However, do not smudge too much as that will just wipe the eyeliner off completely.

9. Apply lip moisturizer, let it set for a minute or two. Smooth on Prestige Lip Color in Constant Coral and top with Bloom Lip Gloss in Seashell.

10. Curl your lashes then coat it with Smashbox Bionic mascara- both upper and lower lashes.

11. Set brows using Prestige Brow Perfection Brow Building System.


Now just add some hippie accessories and match it with a maxi quilted dress, and the Boho Chic is ready to hit the scene! hope you had fun creating the look as much as I did :)


Photobucket

Tuesday, September 27, 2011

FLATTERSHADES: Smokin' Hot Green Hues!

It was raining all day , got nothing to do, wasn't able to come to the office because of the typhoon . Spent the whole morning with my daughter just lying around sound tripping but then the electricity went off...Cait - my little princess had her afternoon nap, I started getting bored---but not that long :) Knowing myself, I never entertain boredom. I started cleaning my closet and I suddenly remember that I recently got this Lacoste shopping tote. I haven't inspected the bag yet, hmmmm let me rephrase that-- I haven't got the chance to "savor" the bag yet :) yes! that's more like it hahah! I instantly fell in love with the color combination of the fabric the moment I saw this. I'm sure you will too , Check it out :)


Lacoste's R. George Foldable Shopping Bag
Its big enough to carry all your stash!
It's lightweight yet its obviously durable enough to be called a "shopping tote"
Its definitely a shopaholic's must have!


Now enough of the bag, what really made me post this entry was the bag's military color. I just simply love it, I was inspired to do a FOTD :-) Whew! Its been a while since I last posted an FOTD entry, to makeup junkies out there, I hope you find this interesting. But before anything else, let me apologize for the poor pictures that I'm going to post here. I just used a cell phone camera that's why I can't capture the colors vividly.

First, before applying any makeup products to your skin. Don't forget to cleanse, tone and moisturize which may aslo serve as a primer so that your skin will hold your makeup really well, and that your makeup will last for a longer period.


As you can see on the picture above, 1st pic is obviously my "before look" or also known as my "terrible- haggard- 3 hours -sleep- look" :)) , now you know I'm the girl with the guts to post my before picture :). Next, after your primer, you can now put on your foundation, here I used MAC studio fix in NC 35. Obviously I have dark circles , I used MAC Studio finish concealer in NC 30. You can now see a much clearer and even toned skin. Now its my turn to say ... THANK GOD FOR CONCEALERS. Next picture , I already did my eyebrows wherein I used MAC's lingering eye pencil.

Now for the eyes, I just played with coastal scents palette in green hues. First I applied a brighter shade of green, then mixed it with a darker shade of green, just don't forget to blend it well, make sure that there are no harsh edges everything should be well blended. For this particular eye makeup , I used 3 different shades of green besides the browbone hi liter.
For hi-lite, I used Makeup For Ever's star powder in yellow. After the eyeshadow, I used green eyeliner to line the eyes, just the inner rim and the water line. For the outer rim, I used black eyeliner. Just smudge along the lines to give a smokey effect. For the lashes, I used 2 coats of Maybelline Volum Express. For me, there's only one mascara brand that works - its Maybelline.

For the cheeks I used MAC's PInk Swoon, and Makeup For Ever contour palette for contouring.

For the lips, I used MAC's Select Cover-up to neutralize the color of my lips. Select Cover-up is actually a liquid concealer but I also use it for the lips specially if you need to cover it up to better achieve a certain lip color. After applying the cover-up, I topped it with Maybelline's Iced Caramel and finished it off with Nars Lip Gloss in Turkish Delight.


There you go, a military color inspired makeup look! :-), who says you can't wear green? Now if only I can find my fatigue during my CAT days...... LOL

Just incase your loving that bandana, its from Evita Peroni :)

Stay dry & Be safe!
Photobucket


Vida Belle of Makeup By AnneVida also conducts Personal Beauty Makeup Workshop for Makeup Avenue. Aside From day makeup,corporate makeup and evening makeup, the module also includes a step by step demo on different looks such as The Smokey Eye and The Bronzey-Summer makeup. For inquiries on rates & schedule, you may send us a message through: annevidaglam@gmail.com or at +639175776136


Monday, September 26, 2011

PROJECT: Shop For A Cause

10 Years ago, I was the girl with no plans. I work to earn. I earn to live. Setting goals was never my priority I was just going with the flow. I grabbed the first job that landed on my hands, without thinking if it interests me or not, all I knew was that I graduated from college and the next sensible thing to do is to have a job.

What are these for? Why am I here? And what am I to others? These are just some of the unanswered questions that keep popping in my head which I refuse to deal with.

Stepping out of my comfort zone and meeting special friends who encouraged and helped me to go for what I truly love doing was probably one of the biggest blessing that God has given me. Starting a new career wasn’t that easy for me I had to learn and go through the process but as the saying goes, believe in yourself, have faith in your abilities. Without a humble but reasonable confidence in your own powers you cannot be successful or happy. It’s never too late for anything that your heart desire.

And now, here I am again. But this time, I have dreams, I have plans, I have goals and I’m slowly getting there with a happy heart. Why with a happy heart? The moment I started counting my blessings, my whole life turned around. That’s when I realized that a blessing is not about what you receive or what you get in return after doing a hard work. It’s all about what you are willing to give, it’s all about being in the position or being able to give and most importantly having a heart that’s capable of giving – that for me is what you call a blessing.

Last May, Makeup by AnneVida celebrated its 4th year anniversary with the orphans of Little Angels Home Inc. It’s our simple way of sending our heartfelt gratitude to the Lord for giving us 4 successful years in the business.

I was lucky enough that my business partner – Anne and I share the same ideals when it comes to these things so we decided to do this on a regular basis.

What made it even special was that we were able to encourage our past clients and friends to share their blessing to these kids as well by raffling off a Beauty Makeover to few chosen donors, we conducted a raffle contest :

A Beauty Treat for A Beautiful Heart.


Our studio was filled with toys, clothes and books. It was a huge success.

Just this month, I celebrated my birthday and made it more meaningful by launching my Shop for A Cause Project. I gathered all my personal stuffs both used and new ones and sold it to my close friends. 100% of what I earned from it was used to buy grocery items and food for the kids of Little Angels Home Inc. Again, it was a success. We were overfilled with joy because these kids were really grateful for having us around to support them in our own little way. I thank each and every one of my friends who participated, even for a single item- every donation counts for these children. They say that the smallest good deeds are worth a thousand grand intentions.

My Shop for A Cause Project is still up, I decided to maintain it so I can continuously support these kids, at the same time this will give my friends and other people a chance to share their blessings despite of their busy schedule. Again, 100% of the earnings from my personal items will automatically benefit the Little Angels Home Inc.

Moving forward, I am also opening my shop to my friends who wanted to sell their items as well, once you choose to buy their stuff, 10% of it will automatically benefit the Kids of LAHI or to any charity organization that we wish to help in our next project. As of now, we are set to celebrate Christmas with the kids of LAHI this coming December.

For those who are interested to view my online shop, you can send me a message through mymakeupjournal@gmail.com. In the future, I will also post a Shop for A Cause entry on a regular basis here in my blog site.

Thank you very much for all your support.


Photobucket