Showing posts with label MU by Annevida. Show all posts

Monday, October 31, 2011

Go NAKED!

Urban Decay's Naked was released last year for their fall collection. Trust me, this has been my ever -reliable palette whenever I do bridal, I just can leave home without it. I would simply describe it as the only palette that you'll ever need. Be it from soft neutral look too hot smoky glam, your collection wouldn't be complete without it. So far, its the best Urban Decay palette I ever tried. Packed in a velvety -chocolate color sleek case, which looks really sophisticated, you just got to have one.


Though I know this is not something new to us makeup junkies, I received a few messages requesting me to do a demo using the Naked palette, so here goes..

THE MUST-HAVES:

1. MODEL & CO 4 pc brush set -
Its my first time to try their brush and I actually liked it. The bristles are not too soft and not too hard, just enough to be able to blend well and the bristles aren't harsh to the skin.
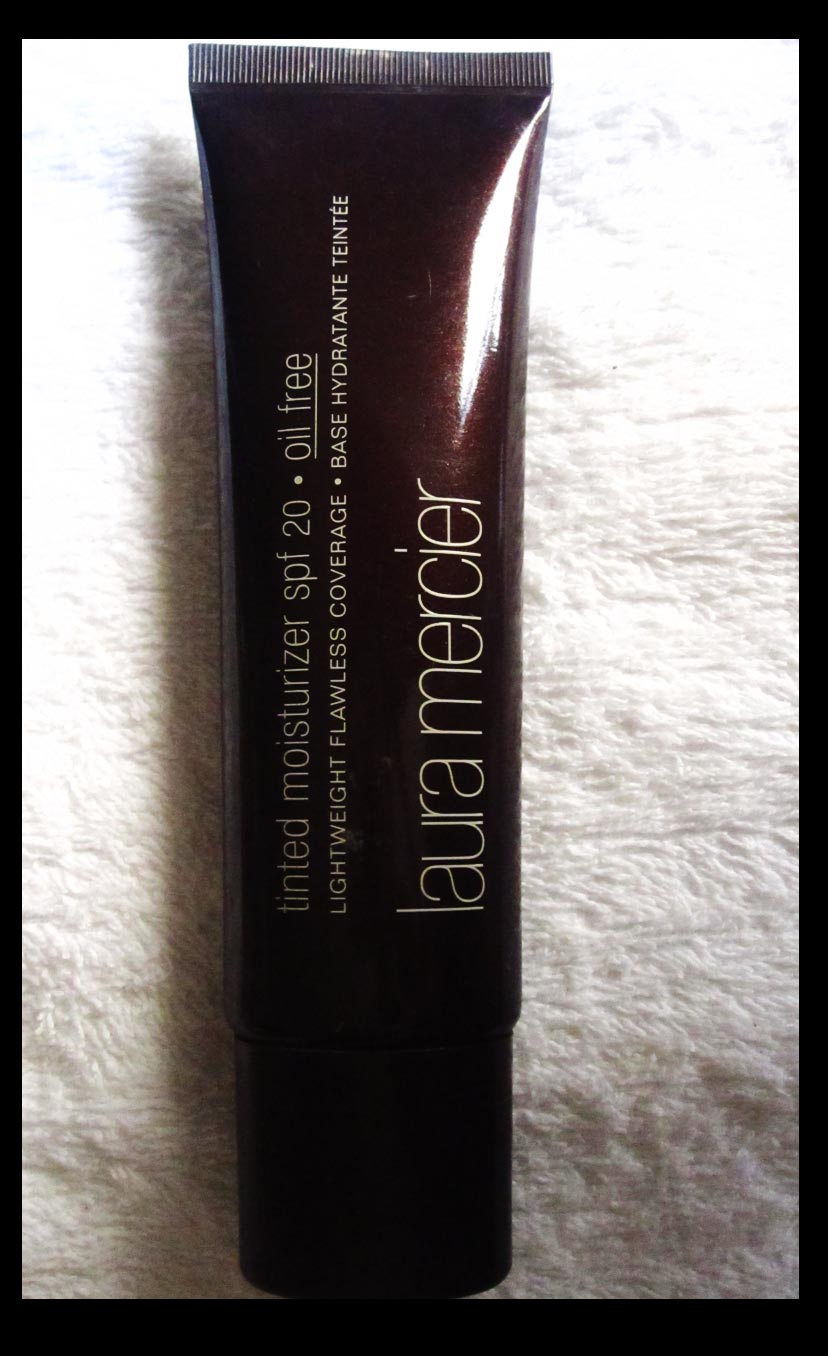

2. LAURA MERCIER Oil-Free TINTED MOISTURIZER -
This time I decided to use a tinted moisturizer instead of the usual foundation. So far this is the best tinted moisturizer I ever tried, though a bit expensive compared to other tinted moisturizers, this one has a buildable coverage giving you the same result of a good quality foundation without having its usual heavy icky feeling to the skin. ( Read more about Laura Mercier Tinted Moisturizer on my past blog entry: http://makeupjournal.blogspot.com/2008/10/laura-mercier-four-steps-to-flawless.html)


3. Model & Co Blush Cheek Powder in Peach Bellini, Bloom Lip Gloss in Gyspy, BDB (Billion Dollar Brows) A hint of tint. I got all these from Beauty Bar Philippines.


4. NARS Lipstick in Schiap - This is the hottest shade of pink lip color that you'll ever find in the market today. It has a matte finish but it glides perfectly on your lips.


5. URBANK DECAY Ink for the Eyes - If theres one product from Urban Decay that I would recommend you to buy - aside from their 24/7 eyepencils and Naked Palette , its the UD Ink for the Eyes. It comes with the applicator angled brush to create the perfect eye line and the smoldering tip that gives it a good smudge to create a smoky or natural line. It blends with ease but the product doesn't wear off easily.

Go NAKED!

1. First of all, have your skin prepped. Do not forget to Cleanse, Tone and Moisturize. This time I used Juice Beauty toning facial mist. It smelled great and it was able to cleanse my face really well without the sting that the usual toner does to our face. Another nice thing about this product is , its organic, its all natural, so its prefect for sensitive skin. You can score this at Beauty Bar Philippines.

2. Apply your tinted moisturizer evenly all over the face. I always use a stippling brush when applying any liquid or cream foundation to my skin.
(Learn the advantage of using a stippling brush , read about it from my past blog entry here --
http://makeupjournal.blogspot.com/2011/10/beauty-bar-get-missy-lee-look.html
)

3. After applying foundation or tinted moisturizer, dust enough amount of loose powder all over the face using a powder brush to set your foundation.

4. Contour - You have the option to contour or not, for daytime you can leave it as it is without contouring but for evening wear ,I advise you to contour your face to further enhance your facial bone structure . You can see the difference from picture 3 and 4 , picture 3 looks flat , while the last picture which was contoured looked so much better. This is also a must if you plan to take pictures. The contour itself gives you a complete look without adding any color to your face.

5. Groom your eyebrows ALWAYS. Comb, snip, shave , pluck or have a threading session with a pro, I don't care but If you want your eyes to pop beautifully, always groom your eyebrows. I really don't get it why some still prefer to have a bushy eyebrows. If you think keeping your bushy- stubborn eyebrows give you the natural look, you may want to think about it again.

(double click on the pic to see instructions)

For this particular look I used 4 shades from the Naked Palette: Half Baked, Buck , Creep and Virgin

6. Using an eyeshadow applicator brush , apply Half-Baked on to your lids until the crease line.
Blend well towards the brow bone, make sure that there are no harsh lines.

7. Using your round tip eyeshadow brush, apply buck on your crease line. Blend by following the natural contour of your eyes. When blending, remember NOT to blend it too much because this might wash off the color of your eyeshadow completely. Jut use the right amount of pressure.

8. Deepen the crease in the outer corner of your eyes by applying and blending in Creep.

9. For highlights, add a touch of Virgin to your brow bone and inner corner of your eyes, blend very lightly.

10. Put on your eyeliner, using UD's Ink for the eyes.
11. Smudge it with the smudge tip, to give it a more natural - smoky effect.

and now your look should be similar to this:

12. Curl your lashes and add two coats of mascara. To those who refuse to use mascara, okay fine . But here's the reason why I prefer you to use a curler and a mascara:

The left eye, obviously doesn't have a mascara on . While the right eye, looked really bigger and bolder than the other eye, and its all because of a curler and a mascara. If you're not convinced, go try it yourself. :)

A nd for the final touches, put on your Peach Bellini blush on to the apples of your cheeks , this shade goes really well on morena skin. Swipe on your Schiap lipstick and top it off with Bloom's Gypsy lip gloss and voila!


Hope you like it! ;-)

Photobucket

Tuesday, September 27, 2011

FLATTERSHADES: Smokin' Hot Green Hues!

It was raining all day , got nothing to do, wasn't able to come to the office because of the typhoon . Spent the whole morning with my daughter just lying around sound tripping but then the electricity went off...Cait - my little princess had her afternoon nap, I started getting bored---but not that long :) Knowing myself, I never entertain boredom. I started cleaning my closet and I suddenly remember that I recently got this Lacoste shopping tote. I haven't inspected the bag yet, hmmmm let me rephrase that-- I haven't got the chance to "savor" the bag yet :) yes! that's more like it hahah! I instantly fell in love with the color combination of the fabric the moment I saw this. I'm sure you will too , Check it out :)


Lacoste's R. George Foldable Shopping Bag
Its big enough to carry all your stash!
It's lightweight yet its obviously durable enough to be called a "shopping tote"
Its definitely a shopaholic's must have!


Now enough of the bag, what really made me post this entry was the bag's military color. I just simply love it, I was inspired to do a FOTD :-) Whew! Its been a while since I last posted an FOTD entry, to makeup junkies out there, I hope you find this interesting. But before anything else, let me apologize for the poor pictures that I'm going to post here. I just used a cell phone camera that's why I can't capture the colors vividly.

First, before applying any makeup products to your skin. Don't forget to cleanse, tone and moisturize which may aslo serve as a primer so that your skin will hold your makeup really well, and that your makeup will last for a longer period.


As you can see on the picture above, 1st pic is obviously my "before look" or also known as my "terrible- haggard- 3 hours -sleep- look" :)) , now you know I'm the girl with the guts to post my before picture :). Next, after your primer, you can now put on your foundation, here I used MAC studio fix in NC 35. Obviously I have dark circles , I used MAC Studio finish concealer in NC 30. You can now see a much clearer and even toned skin. Now its my turn to say ... THANK GOD FOR CONCEALERS. Next picture , I already did my eyebrows wherein I used MAC's lingering eye pencil.

Now for the eyes, I just played with coastal scents palette in green hues. First I applied a brighter shade of green, then mixed it with a darker shade of green, just don't forget to blend it well, make sure that there are no harsh edges everything should be well blended. For this particular eye makeup , I used 3 different shades of green besides the browbone hi liter.
For hi-lite, I used Makeup For Ever's star powder in yellow. After the eyeshadow, I used green eyeliner to line the eyes, just the inner rim and the water line. For the outer rim, I used black eyeliner. Just smudge along the lines to give a smokey effect. For the lashes, I used 2 coats of Maybelline Volum Express. For me, there's only one mascara brand that works - its Maybelline.

For the cheeks I used MAC's PInk Swoon, and Makeup For Ever contour palette for contouring.

For the lips, I used MAC's Select Cover-up to neutralize the color of my lips. Select Cover-up is actually a liquid concealer but I also use it for the lips specially if you need to cover it up to better achieve a certain lip color. After applying the cover-up, I topped it with Maybelline's Iced Caramel and finished it off with Nars Lip Gloss in Turkish Delight.


There you go, a military color inspired makeup look! :-), who says you can't wear green? Now if only I can find my fatigue during my CAT days...... LOL

Just incase your loving that bandana, its from Evita Peroni :)

Stay dry & Be safe!
Photobucket


Vida Belle of Makeup By AnneVida also conducts Personal Beauty Makeup Workshop for Makeup Avenue. Aside From day makeup,corporate makeup and evening makeup, the module also includes a step by step demo on different looks such as The Smokey Eye and The Bronzey-Summer makeup. For inquiries on rates & schedule, you may send us a message through: annevidaglam@gmail.com or at +639175776136


Monday, September 26, 2011

PROJECT: Shop For A Cause

10 Years ago, I was the girl with no plans. I work to earn. I earn to live. Setting goals was never my priority I was just going with the flow. I grabbed the first job that landed on my hands, without thinking if it interests me or not, all I knew was that I graduated from college and the next sensible thing to do is to have a job.

What are these for? Why am I here? And what am I to others? These are just some of the unanswered questions that keep popping in my head which I refuse to deal with.

Stepping out of my comfort zone and meeting special friends who encouraged and helped me to go for what I truly love doing was probably one of the biggest blessing that God has given me. Starting a new career wasn’t that easy for me I had to learn and go through the process but as the saying goes, believe in yourself, have faith in your abilities. Without a humble but reasonable confidence in your own powers you cannot be successful or happy. It’s never too late for anything that your heart desire.

And now, here I am again. But this time, I have dreams, I have plans, I have goals and I’m slowly getting there with a happy heart. Why with a happy heart? The moment I started counting my blessings, my whole life turned around. That’s when I realized that a blessing is not about what you receive or what you get in return after doing a hard work. It’s all about what you are willing to give, it’s all about being in the position or being able to give and most importantly having a heart that’s capable of giving – that for me is what you call a blessing.

Last May, Makeup by AnneVida celebrated its 4th year anniversary with the orphans of Little Angels Home Inc. It’s our simple way of sending our heartfelt gratitude to the Lord for giving us 4 successful years in the business.

I was lucky enough that my business partner – Anne and I share the same ideals when it comes to these things so we decided to do this on a regular basis.

What made it even special was that we were able to encourage our past clients and friends to share their blessing to these kids as well by raffling off a Beauty Makeover to few chosen donors, we conducted a raffle contest :

A Beauty Treat for A Beautiful Heart.


Our studio was filled with toys, clothes and books. It was a huge success.

Just this month, I celebrated my birthday and made it more meaningful by launching my Shop for A Cause Project. I gathered all my personal stuffs both used and new ones and sold it to my close friends. 100% of what I earned from it was used to buy grocery items and food for the kids of Little Angels Home Inc. Again, it was a success. We were overfilled with joy because these kids were really grateful for having us around to support them in our own little way. I thank each and every one of my friends who participated, even for a single item- every donation counts for these children. They say that the smallest good deeds are worth a thousand grand intentions.

My Shop for A Cause Project is still up, I decided to maintain it so I can continuously support these kids, at the same time this will give my friends and other people a chance to share their blessings despite of their busy schedule. Again, 100% of the earnings from my personal items will automatically benefit the Little Angels Home Inc.

Moving forward, I am also opening my shop to my friends who wanted to sell their items as well, once you choose to buy their stuff, 10% of it will automatically benefit the Kids of LAHI or to any charity organization that we wish to help in our next project. As of now, we are set to celebrate Christmas with the kids of LAHI this coming December.

For those who are interested to view my online shop, you can send me a message through mymakeupjournal@gmail.com. In the future, I will also post a Shop for A Cause entry on a regular basis here in my blog site.

Thank you very much for all your support.


Photobucket

Wednesday, October 8, 2008

YOU'RE INVITED! Before I Do 4th Edition Bridal Fair


Our team will be one of the exhibitors at VRC Creative Event's Before I Do 4th Edition: Weddings and Destinations. Avail of our free makeup trials and discounted rates to all soon to be brides!! Our booth is located at the left wing E6. See you there!


Photobucket

Monday, April 14, 2008

EVENT: BRIDAL EXHIBIT, Megamall Megatrade Hall April 12 – 13, 2008.

that's Anne trying to figure out what to do..


tadahhh!
VRC Creative Events, Before I Do 3rd Edition. Dream Weddings & Destinations
We had our very firs bridal exhibit sooo exciting! , I was quite hesitant at first because since it was our first we basically have no idea how our booth should look like, i did asked my sister in law to design a plan for us but then the space was too small inorder to implement the plan..in addition to that, the other makeup artist booths were intimidating......but then luckily we pulled it off and thought of some great ideas. Guess what? it was a success! number of people were always checking out our area since all of our sample works are posted on the walls, they didn't have to search through an album or through the internet because it was ll there posted before them!

This is our vanity, this is what I always bring to my bridal gigs.

The result? we had to give a lot of free makeup trials..I can't even remember how many! They were all lined up..well, it was an investment plus a wonderful experience so we didn't have any reason to complain PLUS PLUS PLUS we had quite a number of bookings made on the spot! lets just say...it was quite enough to pay for the booth fee including the free trials that we gave :) nice.


That's anne having a frenchfries break!
Anne and I would like to say thank you to all of our friends who helped us in putting up our first exhibit :) Til next November!!!
Stay Beautiful!
Photobucket