Showing posts with label Laura Mercier. Show all posts

Thursday, February 9, 2012

The 5 Minute Make Over


Let’s face it. Looking pleasant in the morning, gives us a positive vibe and it does make an impression. Same goes when we look tired , everything seems to be dragging and it usually triggers our temper.

Who doesn’t want to look fresh as you attend to your daily routine? Whenever we talk to our workshop attendees we always ask them what they think about makeup, there’s usually one story to hear: Putting on makeup takes so much of their time, and that it isn’t necessary unless you’re going to a party.

Putting on makeup doesn’t necessarily mean you have to run around looking like a clown. You don't need to spend hours on your makeup -- unless you're going to a wedding or other special event. A few quick tricks in the morning can hide your imperfections and accentuate your assets, now who doesn’t want that? It doesn't hurt to give yourselves the much needed 5 minute attention. After all, you deserve it.

Here’s a step by step 5 minute makeover, which I use myself. If you were able to attend one of our workshop, (specifically from our 5th workshop- onwards.) I always do a demo on this to show our participants how makeup can instantly improve our looks without looking like you just stepped out of the salon. This can be very useful specially to working moms who are always on a rush ending up looking worn-out before even starting your day. My demo never fails to change our attendees’ impression on makeup application. Try to go through these steps and witness how makeup can give you the “I –just-had-an-8-hrs-of-sleep” look!

Of course I don’t have to tell you every time to never ever take your skin care routine for granted specially the minute you reach the age of 20. You will start seeing the benefit of these routine as you age.

1. Cleanse – Every morning before you do anything else to your skin, wash your face. Same goes before you sleep at night. Never sleep with your makeup on, always wash your face using your chosen facial cleanser before going to sleep and after waking up.

2. Tinted Moisturizer – While your skin is still damp from washing, quickly apply just enough amount of tinted moisturizer, using a sponge or your finger tips. This will serve as your foundation. Just spread it evenly on your skin, same way you apply your regular moisturizer, this should just take a few seconds to get an even application. Why tinted moisturizer? Let me tell you why I chose this over the usual liquid or compact foundation that makeup artists normally use on special occasions.

· Time saver: Tinted moisturizers can give you a fresh, natural look without the need to apply foundation makeup. You might find that tinted moisturizer is the only beauty product you need on many occasions. It can save you time by combining a simple makeup solution with a beauty product you already use. If you are a busy woman, this can help you look your best without taking up a large chunk of your morning time.

· Sun protection: Many tinted moisturizers combine SPF protection along with a hint of color. This combination protects your skin from the harmful effects of the sun while providing even color coverage and the skin-nourishing moisture of ordinary moisturizers. Using a tinted moisturizer with SPF every day is a healthy habit that will help you keep your face fresh.

· Younger looking skin: Some heavy makeup can make wrinkles appear more pronounced instead of deftly hiding them. Tinted moisturizers can help hide wrinkles and fine lines because they have lighter formulations than most foundation makeup. The coverage provided by tinted moisturizers also serves to minimize skin imperfections and wrinkles to provide a healthy, more youthful look.

· Moisture protection: If you are skipping moisturizer, then you might not be caring for your skin properly. Quality tinted moisturizers can work to hydrate the skin and help to prevent moisture loss while evening out your skin tone. The added moisture helps to keep the skin elastic and soothes the inflammation of dry, irritated skin.

Some quality tinted moisturizer brands that I recommend:

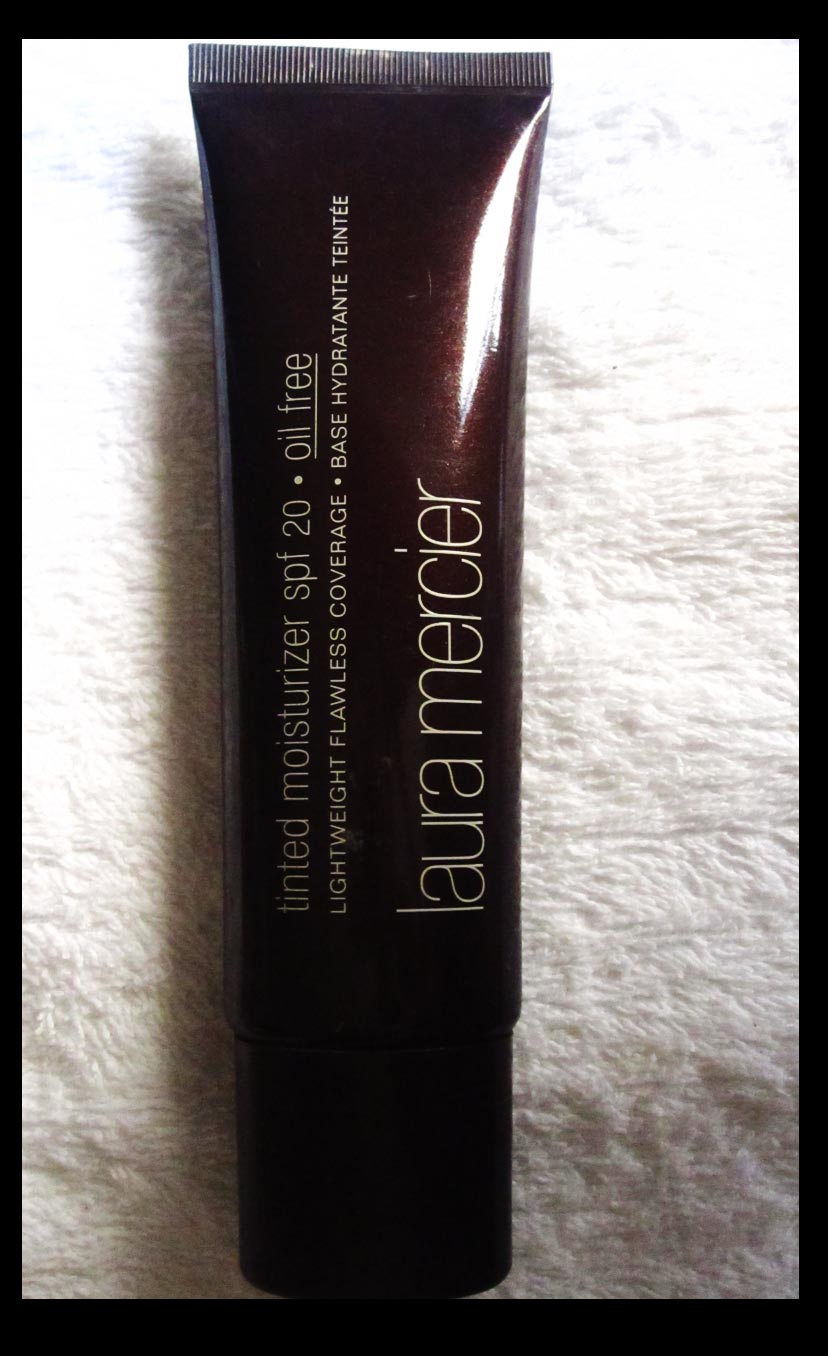
Laura Mercier (named as the best tinted moisturizer , quite pricey but its really good and its worth every penny. Available in 2 variants: oil free and skin hydrating, I'm using the oil-free variant, because my entire face tend to get really oily, not just the t-zone area. ), Myra Vita Glow Tinted Mositurizer (if you’re on a tight budget this works fine as well, I also use this whenever I run out of my usual brand) , Nivea (not sure though if this is still available in the market today, but I used to have this and its really good) and Benefit’s You Rebel Tinted Moisturizer.


3. Concealer – Conceal only when necessary. I prefer liquid concealer for everyday use so it won’t give you that heavy feeling to the skin, its also your best bet to combine with your tinted moisturizer. Just put a small dot on your fingertips and apply by gently patting it on the desired area until it blends to your skin – normally you apply this on the under eye area or any other skin imperfection that wasn’t able to cover by your tinted moisturizer. Do not overdo it since our aim here is to look as natural as possible. To hide those dark under eye circles , choose a concealer that is one shade lighter. Concealer shades can be complicated for those who aren’t familiar with makeup, (Concealer has different shades: green, orange, violet, beige, pink, white etc..) because it varies depending on what you are trying to hide we usually use these for bridal makeup which often requires a perfect , flawless finish. However, if its just for your daily makeup routine, you may use a concealer according to your skin tone.

If you think your tinted moisturizer already did a good job in evening out your skin tone, feel free to skip the concealing part. I personally do not use concealer for my everyday makeup.

However, should you decide to use a concealer, don’t forget to top it off with a smoothing layer of powder foundation. Just a little amount to set your concealer.

4. Apply Loose Powder – After applying your tinted moisturizer and concealer, get your big brush, dip it in your loose powder, tap it to remove excess powder then lightly dust it all over your face, using feathery strokes. Be careful not to deposit too much powder just a little amount of talc should do the trick. If you want to achieve a natural flawless finish, use a brush. The powder should not only make your skin look smoother, this should also eliminate the sticky feeling caused by the moisturizer and for your makeup to last longer.

5. Blush – Choose a subtle shade of blush that complements your skin tone, you can ask help from your reliable makeup consultants. (for first timers living here in Manila, I suggest you go to Rustans' makeup counters they usually have professional makeup artists situated in each area, they can help you choose the right shades for you) Always try it on to yourself first before buying anything. Avoid blush that has shimmer in it if you want your makeup to look as natural as possible.

How to apply: First, start with a good quality blush brush. You can accentuate your face and cheeks naturally. Smile and you will see the fleshy part that stands out the most - this is the apple of your checks. This is your starting point for applying your blush. Apply a light layer of blush to the apples of your cheeks and blend up and back TOWARDS THE DIRECTION of your hair line (NOT UNTIL YOUR HAIRLINE), do not forget to blend, we don't want you looking like someone just slapped or punched you on the face. A 2-second swipe for each cheek should be enough, don’t overdo it!.


6. Mascara – Fear not!! this look doesn’t require you to put on any eyeshadow or eyeliner…all you have to do is put on a mascara to emphasize your eyes. Believe me it does wonders! use waterproof mascara to avoid smudging. If you do not have eye makeup remover, you can take it off with the help of a baby oil.

7. Lip Moisturizer / Lip Gloss / Lip stick – Make sure that your lips are well moisturized. One sure way of looking unhealthy is having a pale, dry , cracked lips. Again, if you want it to look as natural as possible, you may use a lightly tinted lip gloss instead of the usual lip stick. If you plan to go out at night, that’s the perfect time to use your favorite lip shade.

...and voila! Now who can tell that you just had a few hours of sleep? Try this and you'll stop hearing these words: YOU LOOK TIRED HONEY!

Enjoy!
Photobucket


photo credits:
http://getridofeyewrinkles.com


Monday, October 31, 2011

Go NAKED!

Urban Decay's Naked was released last year for their fall collection. Trust me, this has been my ever -reliable palette whenever I do bridal, I just can leave home without it. I would simply describe it as the only palette that you'll ever need. Be it from soft neutral look too hot smoky glam, your collection wouldn't be complete without it. So far, its the best Urban Decay palette I ever tried. Packed in a velvety -chocolate color sleek case, which looks really sophisticated, you just got to have one.


Though I know this is not something new to us makeup junkies, I received a few messages requesting me to do a demo using the Naked palette, so here goes..

THE MUST-HAVES:

1. MODEL & CO 4 pc brush set -
Its my first time to try their brush and I actually liked it. The bristles are not too soft and not too hard, just enough to be able to blend well and the bristles aren't harsh to the skin.


2. LAURA MERCIER Oil-Free TINTED MOISTURIZER -
This time I decided to use a tinted moisturizer instead of the usual foundation. So far this is the best tinted moisturizer I ever tried, though a bit expensive compared to other tinted moisturizers, this one has a buildable coverage giving you the same result of a good quality foundation without having its usual heavy icky feeling to the skin. ( Read more about Laura Mercier Tinted Moisturizer on my past blog entry: http://makeupjournal.blogspot.com/2008/10/laura-mercier-four-steps-to-flawless.html)


3. Model & Co Blush Cheek Powder in Peach Bellini, Bloom Lip Gloss in Gyspy, BDB (Billion Dollar Brows) A hint of tint. I got all these from Beauty Bar Philippines.


4. NARS Lipstick in Schiap - This is the hottest shade of pink lip color that you'll ever find in the market today. It has a matte finish but it glides perfectly on your lips.


5. URBANK DECAY Ink for the Eyes - If theres one product from Urban Decay that I would recommend you to buy - aside from their 24/7 eyepencils and Naked Palette , its the UD Ink for the Eyes. It comes with the applicator angled brush to create the perfect eye line and the smoldering tip that gives it a good smudge to create a smoky or natural line. It blends with ease but the product doesn't wear off easily.

Go NAKED!

1. First of all, have your skin prepped. Do not forget to Cleanse, Tone and Moisturize. This time I used Juice Beauty toning facial mist. It smelled great and it was able to cleanse my face really well without the sting that the usual toner does to our face. Another nice thing about this product is , its organic, its all natural, so its prefect for sensitive skin. You can score this at Beauty Bar Philippines.

2. Apply your tinted moisturizer evenly all over the face. I always use a stippling brush when applying any liquid or cream foundation to my skin.
(Learn the advantage of using a stippling brush , read about it from my past blog entry here --
http://makeupjournal.blogspot.com/2011/10/beauty-bar-get-missy-lee-look.html
)

3. After applying foundation or tinted moisturizer, dust enough amount of loose powder all over the face using a powder brush to set your foundation.

4. Contour - You have the option to contour or not, for daytime you can leave it as it is without contouring but for evening wear ,I advise you to contour your face to further enhance your facial bone structure . You can see the difference from picture 3 and 4 , picture 3 looks flat , while the last picture which was contoured looked so much better. This is also a must if you plan to take pictures. The contour itself gives you a complete look without adding any color to your face.

5. Groom your eyebrows ALWAYS. Comb, snip, shave , pluck or have a threading session with a pro, I don't care but If you want your eyes to pop beautifully, always groom your eyebrows. I really don't get it why some still prefer to have a bushy eyebrows. If you think keeping your bushy- stubborn eyebrows give you the natural look, you may want to think about it again.

(double click on the pic to see instructions)

For this particular look I used 4 shades from the Naked Palette: Half Baked, Buck , Creep and Virgin

6. Using an eyeshadow applicator brush , apply Half-Baked on to your lids until the crease line.
Blend well towards the brow bone, make sure that there are no harsh lines.

7. Using your round tip eyeshadow brush, apply buck on your crease line. Blend by following the natural contour of your eyes. When blending, remember NOT to blend it too much because this might wash off the color of your eyeshadow completely. Jut use the right amount of pressure.

8. Deepen the crease in the outer corner of your eyes by applying and blending in Creep.

9. For highlights, add a touch of Virgin to your brow bone and inner corner of your eyes, blend very lightly.

10. Put on your eyeliner, using UD's Ink for the eyes.
11. Smudge it with the smudge tip, to give it a more natural - smoky effect.

and now your look should be similar to this:

12. Curl your lashes and add two coats of mascara. To those who refuse to use mascara, okay fine . But here's the reason why I prefer you to use a curler and a mascara:

The left eye, obviously doesn't have a mascara on . While the right eye, looked really bigger and bolder than the other eye, and its all because of a curler and a mascara. If you're not convinced, go try it yourself. :)

A nd for the final touches, put on your Peach Bellini blush on to the apples of your cheeks , this shade goes really well on morena skin. Swipe on your Schiap lipstick and top it off with Bloom's Gypsy lip gloss and voila!


Hope you like it! ;-)

Photobucket

Saturday, October 25, 2008

LAURA MERCIER: Four Steps to a Flawless Face.

Makeup is a part of my everyday routine, I can't go to work without putting my makeup on. Knowing how harsh this could be to my skin, I opted to use tinted moisturizer than the ordinary foundation. I just wanted my face to look fresh , with a natural glow.

I've done some research through the internet and it seemed like everyone is raving about Laura Mercier's tinted moisturizer. ..when Sephora chose this as this year's best tinted moisturizer, I knew I just have to get one.

Though it was pretty painful to my pocket, I got the big tube at around HKD400 at Faces, HK. I got the oil free (yes they have oil free ver!) in Sand shade...and the rest my dear is history... I just couldn't stop bragging about this product.


First, my then oily face is now less oily..(it still does become oily at the end of the day...nothing that a blotting film couldn't handle.) ...BUT the good part is--it does give my face a healthy glow. I swear!! my friends actually started noticing that my face has a natural sun kissed glow! I know some people wouldn't prefer using tinted moisturizers alone since its too sheer..but Laura Mercier is sheer- buildable coverage, you just have to apply more if you opt for more coverage. Set it with your favorite loose powder and you will see what you are looking for.

I may sound so biased since I'm a Laura fan (besides Bobbi Brown..) and yes I even have her book - The Ultimate Guide to A flawless face and I've been incorporating her makeup styles and tips to my own and all of them worked for my clients. Other than that, Ms. Mercier herself is such a down to earth person..I just love everything about her - her perfectly combined skills and personality has been my inspiration.

Ok will stop blabbing now and will prove it to you instead.
Few days ago, I got this package from a friend that actually made my day!!!!!! Tedennnnnn!!


A LAURA MERCIER's FLAWLESS FACE KIT. Simple Techniques.Flawless Results.

Now did I finally got your attention or what?

The Kit contains the ff:

1. Laura Mercier Foundation Primer: A lightweight, oil-free, creamy gel for use under foundation. Creates a smooth invisible layer that acts as a buffer to outside elements and holds foundation and other makeup in place for hours and hours.

2. Laura Mercier Tinted Moisturizer: Sheer, buildable coverage that hydrates the skin, softening and easing fine dry lines. Color stays true and wears evenly leaving a natural dewy finish.


3. Laura Mercier Undercover POt : A combination of 3 of their best-selling products to make concealing quick and easy. Secret Camouflage (left pan) allows you to use very little product to conceal so the skin looks natural, not heavily made up. Secret Concealer's (right pan) soft focus effect smoothes and perfects the area around the eyes. Translucent Loose Setting Powder is a light fine-milled french talc for setting makeup.
4. Laura Mercier Secret Camouflage Brush: POinted tip allows for precise placement of the Secret Camouflage and Secret Concealer in the tiniest areas --shadows, corners of the eyes, tiny scars or blemishes, and other imperfections. Flatter, wider surface at the base is ideal for larger areas--ruddy cheeks, broken capillaries, sin spots and other areas of discoloration.
5. LAura Mercier Camouflage Powder Brush: Perfect size and shape to set Secret Camouflage and Secret Concealer with Loose Setting Powder because it allows you to work in smaller areas. Unique synthetic hairs are designed to pickup and distribute powder precisely and evenly.

6. Laura Mercier Velour Puff:Specially designed texture, molds and conforms as needed to apply powder to all areas of the face.
7. Laura Mercier Sponge - Should be used with all laura Mercier foundations. including the tinted moisturizer. Holds product impeccably. Applies product smoothly and evenly.

8. Step by Step Guide card to flawless face.


Now let me share with you how these babies work:

OK, I seldom do this but for the sake of Laura Mercier I will use my own face for a before and after demo :)
Of course I had to start with spritzing my face with my favorite Shu Deep Sea Water just to make my skin supple. Then on to the 4 steps!


That's me going bare in public for the first time, as you can see, uneven skin tone,dark under eye, breakouts, blackheads all rolled into one :))


STEP 1: Place a pea-size amount of Foundation Primer into your hand and stimulate the skin by lightly massaging in an outward and downward motion onto the face with fingertips.


STEP2: Place a dime-size amount of Tinted Moisturizer into hand and pickup with sponge then apply from the outward portion of the face inwards towards the nose.


STEP3: Apply the Secret Camouflage with the Secret Camouflage brush using feather-like strokes to the darkened areas of the face- blemishes, shadows, scars, the area around the nose, and any other imperfections. APply the Secret Concealer with brush or fingertips to brighten and
minimize darkness or shadows under the eye area.


STEP4: Pick up the Loose Setting Powder with the Camouflage powder brush and apply to the areas just concealed with Secret Camouflage and Secret Concealer to set. To finish your Flawless face, saturate the velour puff with the lose powder and gently press the puff in a rolling motion onto the face to work the powder into the skin to set your makeup for all day wear.


And here's the result, a flawless face without a touch of any other makeup just the ones in the kit. Although I had to put some eyebrows and lip balm :)

Guys, let me know what you think!


Ciao!